Showing posts with label diy. Show all posts

Monday, January 19, 2015

Turquoise Dresser for Violets Nursery

As happens regularly with me, a small redesign becomes me spending days rearranging and redoing my daughter's nursery. As a heads up all of my furniture is second hand and upcycled. I decided I wanted to redo my changing table/dresser. I had decided I wanted turquoise to go with her color scheme. Upon leaving the house to go get some paint, a quick trip to the salvation army turned into an amazing discovery.
This great dresser was originally priced for 89.99 crazy! But it was half off day, so 45.00 still out of my budget. But.... I had a Groupon for 30 bucks so 15 bucks is totally different. I was stoked!
Quick run to actually pick up paint.
I dragged it home and whew it needed some love.
I sanded and cleaned.
I took off all the handles and used a spray primer...heavily
I hate waiting!
I decided on spray paint for this cause I wanted a really shiny finish.
I got a silver hammered spray paint for the handles.
Did I mention how much I hate waiting.
Finally all finished and put into the nursery.
I couldn't love it more! !

Wednesday, January 14, 2015

Baby Food Brilliance

When doing all of the insane research I delved into when discovering I was creating a human. I decided to make all of my own baby food. There are so many reasons
- Cost, it really is silly how much money you would spend buying baby food. A few dollars of vegetables equals an insane amount of grub.

- Knowledge, I am a control freak and I want to know EVERYTHING that goes into my little humans body is healthy. Organic veggies are reasonable when you are making baby food.

- Convience, instead of spending hours researching all the brands and ingredients. I decide what she eats and thaw a few cubes of food.

- Teaching healthy food habits, this way she learns to love food and enjoy the eating process. She watches her food be made, she becomes a part of her food cycle which I feel like our country has lost completely. (Rant for another day)

- Waste, all of the packaging and processing that goes into manufacturing baby food is just plain crazy! The glass and plastic is just looney, after making her food and watching how little it takes I can't imagine the recycling bins of households that don't.

With all that being said, I pre-made all the basic veggies by steaming and blending. I started right after she was born. Each grocery store run I picked up a few items and put them away. Meaning I made them then vacuum sealed them and put them into a freezer. Nothing escaped my blending, not even the Halloween pumpkin. Which made an insane amount of baby food.
By the time violet was eating, we have a stock pile.
Then came the research on how to make it use able. Each vacuum bag holds quite a bit of blended goodness and I didn't want big liquid bags in the fridge so I decided to go with the ice cube method.
I purchased ice cube trays from the dollar store and figured out quickly how brittle they become...fail
I thrifted some great Ikea silicone trays in fun shapes for .25 each. They worked great however filling them was a monster mess and made them really hard to get out...fail
Next was plastic bags with  the tips cut off kinda like an Icing bag. Well the holes stretch and you end up wasting so much food in the bag. Plus you toss the bag after...fail
Finally I had a brilliant idea, I'm sure lots of mom's have figured this out but it was amazing for me. TURKEY BASTER! I fill it up, it doesn't drip, or leak. No wasted plastic and it's so easy to get the cubes out....tahdah
Finally an easy way to get perfect mixing sizes of food, I pull out a bag from the freezer make a few trays. Reseal the bag and voila, easy no mess baby food. We recently went on a five day trip and thanks to some dry ice, had frozen baby cubes for the whole trip. No need to buy any or make any while we were out there.
If you've been debating on baby food hopefully this convinced you, a few hours, a few dollars and voila.

Monday, January 5, 2015

Vintage High Chair Update

I inherited this amazing family heirloom.

It served three generations of meals to some of my family. I respect this chair but I didn't love it. So I did what I love to do and I painted it! I started by lightly sanding it.

I chose an off white that is stain resistant and a water base, incase the Missy decides to chew on it. I also chose white so that it will be easy to repaint it later if I want.

I started by cleaning and lightly sanding it. So it had a better surface to adhere to.

I decided to brush paid to instead of sand because I wanted that thick farmhouse style paint instead of spray. Three coats later and it looked fabulous and so fresh.

I then took black paint and highlighted the cut in accent lines to make them more noticeable. It also made it seem more retro.

I couldn't leave it alone so I made a high back cushion and seat that tie to the chair. And for sure I had to make ruffles on it.

The finished project is epic! Just rad enough for our little princess.

Monday, June 17, 2013

Industrial Boxes turned into Planters

Start with a basic shipping crate
(you can find them outside of  industrial buildings)
 Prep with a great coat of paint

Line with industrial plastic
(dont forget the holes for drainage)
 Mix in great soil
Plants and mulch for water
Trellis made from peach tree clippings and copper scrap wire to lash it together
Tah Dah!!

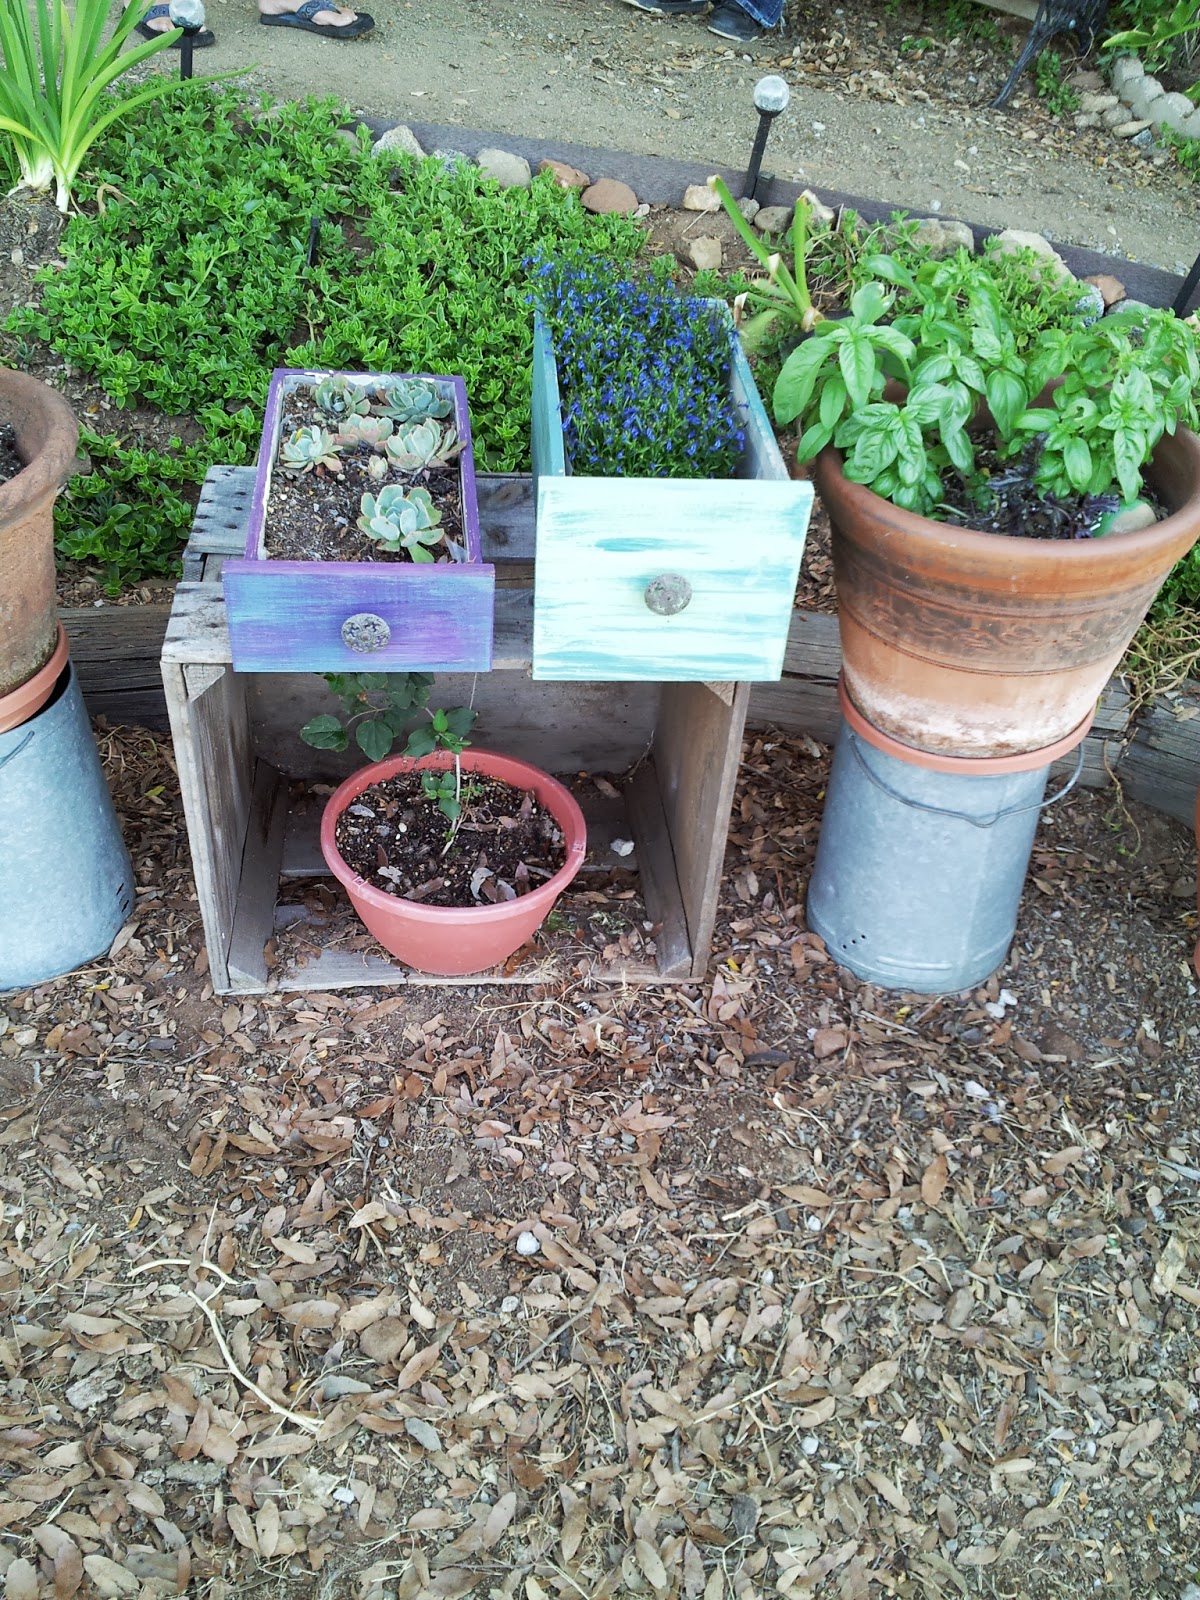
UpCycled Dresser Drawers to Planters

UpCycled Dresser Drawers

Simple change, New paint and fun knobs.
Durable plastic stapled inside.
Don't forget to add some drainage holes in the bottom!!

Thursday, April 4, 2013

Updated Thrift Store Lamp Shade

Thrift store lampshade retake

So once again I forgot to take a before photo but it was just a boring beige shade. 
so before I did anything else I took it outside and spray painted the inside and outside   with a metallic spray. If the inside is doe with a reflective paint the light will be brighter.  I bought some octagonal crystals online to fix a brass lamp that was missing all the crystals. So of coarse I got extra for exactly this purpose. 


 Girl gotta have her sparkles!
I took some leftover black ribbon edging and hot glued it along the inside edge.


a little closer


I took some small silver wire and threaded it through the edging and the crystals. I didn't measure in between or the length of wire because I wanted it to look kinda shabby chic.

Once I had them all along the edge I added some rhinestones along the top edge to finish it off.


Turned it on and if I say so it turned about pretty rad.


Wednesday, April 3, 2013

Christmas Yarn Wreath


Yarn Christmas Wreath

Putting a new spin on an old classic. My mom made yarn wreaths in the seventies and I wanted to make one for myself but the loops and ornaments are a little outdated.. 
I read a great idea on pintrest about using a pool noodle as a frame work for a wreath. this was a great time to try it out. Duct tape works wonders. 
Once i turned it into a circle i started wrapping.  Hours later I took some strings of beads and wrapped them around the yarn with a little help from my glue  gun. 
Some left over Red velvet Fabric turned into a bow finished it up.


Making a pond look gooddd

Making a Pond Look Good
Craigslist makes alot of work in  our house. Sometimes you can find amazing deals but then you have to do something with it. When we bought our house I started missing the frogs from our last house. My husband had a brilliant idea and came home with a pond liner for about a third of the price of the depot stores.  Once he dug it in and filled it I started thinkin that it just didn't look finished. He took the pump and put it inside a sprinkler housing and sunk it next to the liner. Bender Board around the outside edge to separate it from the ice plant.


Molly Malone keeping us company on a trip for supplies.
Play sand works great and its super cheap!!!!


After sinking the pump and lines, I put a flagstone on top to create a ledge for a little palm in a pot.

Flagstone is pretty cheap if you find a rock  and stone supplier and you can pick each piece.
We placed the stones around the ring of the pond and stacked small stones around the bending board to make it blend in a little better. 
Play sand to fill in between the stones and edging.


Stacking the stones to make a fountain was harder than you think.
The finished product was definitely worth it. Before we knew it frogs had moved in and now I have a great chorus in the spring.


Upcycled Cork Boards

Upcycled Cork Boards
Simple Jewelry Displays. Wether in your room or...


Or used to make them more sellable.


It's super simple. Fabric wrap the board, tape or staple the fabric to the back. Use small size ribbon pinned to the cork with push pins to create strait horizontal lines. Add pins along the length so the ribbon doesnt droop with the weight. If you want to hang necklaces or bracelets just use push pins with heads to hang off of. 


Bedside stands updated

During a recent family move my sister was getting rid of these drawers that she was using as craft storage. My bedroom is exactly that. A bed-room, my cali king size bed pretty much overwhelms the room but hey that's what its for right? so anywho I have been lookin for some side stands that will hold a little more and will use a little more vertical space. My wonderful dremel and some spray paint made a huge difference in the layers of paint. Some cute drawer pulls from Michael's sale bin and here ya go.

Before


After
My husbands stand, notice simple drawer instructions. Just kidding babe! :)


Monday, April 1, 2013

Upcycled Kitchen Pot rack from an Old Window frame!

Kitchen Pot rack fabulousness!


     So during my kitchen remake (not remodel cause that happens quickly and with money) I ran into the normal issue of no money and need of a potrack to help w/ space and storage issues. After browsing pintrest and getting some ideas I went outside and started digging through the piles of cool stuff I have collected. With an old broken window frame from a shed my husband tore down. It began.

 Clean it and Masking Tape the glass
 prep and paint, I decided to make it bright and contrasting w my steel blue wall
 My space between the sink and the fridge. Told u I needed more space.
 A quick trip to ikea (2 dollar bars) and the hardware store (ten dollars in chain and hooks)


And Voila! Works awesome!